Showing posts with label shabby chic. Show all posts

Sunday, November 16, 2014

Darn Good Gumbo & We Had a Great Time

It was chilly, and we walked everywhere.
With eyes peeled for beads, I found a few primitive bead strings too.

 I scored lots of interesting focals ... some of them vintage


I also found some great clasps for some multi-strand bracelets, and charms.....


Did I say it was cold?  One might think that Asheville, NC would be a good place to find warmer clothing bits and pieces.  I wanted to find some comfy sweater leggings to go with my new boots, but all I saw were synthetic yukkies.  There seem to be quite a few to select from online, so I will keep fingers crossed. 
(Yes, I am a fiber snob)
We had lunch the first day at Mayfel's  a New Orleans style bistro, and I had the BEST gumbo.  I have to make some now that I am back home.  There is a gumbo recipe that I found in my Grandmother's circa 1900 cookbook that I like a lot, but the DH won't eat okra.  Even though there is not a hint of goo, he has a mental thing about it.  It's darn good gumbo though!  I make mine with chicken and ham (or not), and Mayfel's cooked it up with Anduille sausage in it.  ...They also had beignets.  Oh yeah!  They are a New Orleans delicacy that are very like crispy fried doughnuts, served hot and sprinkled with powdered sugar.   I can't begin to tell you how decadent they are on a cold day with a cuppa hot chicory coffee.  Mayfel's didn't have the chicory coffee, but they did have darn good coffee just the same.

We had a few meals from Katuah, a natural food store's salad table.  Good stuff.  We got some smoked chicken thighs that were so good that the DH is thinking to re-create them here.  Our last day out, we walked around Black Mountain and mid-way through the afternoon we stopped in our fav restaurant and shared a devilishly fudg-i-licious giant slice of chocolate cake and hot tea.  What a warm up that was.
We usually wear ourselves out with walking and sensory overload, and we like to be back at the hotel by late afternoon.  I usually take a portable project.  Remember the BedSack Frock?   It had been stashed away for over a year waiting for the next inspiration.  It has been on my mind ever since I returned from Pennsylvania in September.   I had taken it along and got artsy there with leaves.  I painted fallen oak leaves with fabric paints and pressed them to the fabric.  At the time, I wasn't exactly happy with the result.  Fall colors are not really my piece of cake, and the colors seemed heavy on the muslin canvas.  The next step might have been patching over those leaves.


However, the idea of embroidered water struck days before we left, and so I went armed with blue floss and a trusty needle, and got a lot of embroidery done on the BedSack.  I was stitching the creek.  I like how it's going.  It reminds me of Gustav Klimt with its curls and spirals.  ...Not too much though, cuz its not a raging torrent.  ...Kind of fun to just do whatever with long running stitches and patches of French knots.  The darker blue seems to balance and hold the leaves now, so the plan is to keep them.


One thing I found interesting as we munched on cake and looked out the window of our restaurant, watching the passers by, was that several were carrying newly purchased snow shovels and coasters.  It was beautiful and sunny in the 50's and 60's.  Weather was moving in this week!  It will be below freezing here too.  We have already had snow which is unheard of, and it may be a strange winter.

Wednesday, October 29, 2014

The Art of Upcycle

The Treehouse at Creekview Country Cottage Bed & Breakfast
Have you ever had the urge to re-create yourself?  Maybe it was after a relationship breakup or a pregnancy came to an end, or you lost a bunch of weight?  Well, I have been feeling the urge since returning from Pennsylvania.  My sister and I stayed at the Creekview Cottage Bed & Breakfast during our two weeks there.  It was perfect in every sense ...a private little pocket deep in the woods and mountains and was exactly what I had been dreaming of during the long care-taking ordeal.  Our hostess, Andrea, is now a dear friend to us.  She is an indomitable force wrapped up in a petite lady who has a passion for living.  The three is  us are "senior-ish" but Andrea has so much vitality and spunk that it would be hard for anyone to accurately guess her age.  I was impressed with her fashionable yet practical attire.  She carried off her favorite magentas and pinks and studded sparkly skinny jeans with ease.  My sister has always been a fashion statement, even in her understated way with black and white and gray.  ...And there I was with my old straight-leg stretchy Lee's and plain long sleeve T's, with my decades old Eagle Outfitters boots.  One of my sneakers blew a sole after a few days, and my comfy old jeans had a blowout too.

I didn't realize how out-of-step I had gotten until I saw some photos from the trip.   OMG, I was the granny in the photos!  I couldn't believe my eyes!  For someone who had sewn prolifically, I was always a step ahead of fashion.  For 14 years I was a dressmaker for a European pattern company, and I got the patterns at least a year before they influenced the United States fashion scene.  However, for the past 6 years, I had not really been able to just go shopping.  Getting out of the house was a challenge, and because of that, I made due with what I had.  Meanwhile, everything was getting shabbier and as garments were cast off, they were rarely replaced with something really happening.  When I did get out, I grabbed anything simple that fit and hurried back home.  ...Eventually, I would have been a fashion zilch.  ...Now I have to stop you all right here, as I am not inclined to follow every fad and fancy.  I go for style, and my style was looking like granny's closet.

Well, this calls for a huge makeover.  One of the first things I have done is to look at shoes.  Although I still have not replaced the sneakers, I did purchase some drop-dead gorgeous boots I have been lusting after for the past year:


The BedStu Manchester boot!  I adore them!  They are stylish and yet very simple.  My head is filled with ideas for boot fringes

 and knit boot toppers

...and bracelets and to make.


As I was going through the closet, I came across a favorite magenta knit Henley.  The back of the neckline had separated from the binding and I was ready to toss it when I thought of a Free People favorite that has a patchwork look.  I spent the past few days altering the top and now I have a new/old Henley to wear that is very fashionable.  ...There may be no end to this!


Free People's Kyoto cuff top that inspired me


Wednesday, January 1, 2014

French Script Candles


Here it is as promised!  These candles are reallyeasy and so lovely to look at.  However, and this is a BIG however, they must be used with great care.  Because they are wrapped with tissue paper, they are a danger for fire flare, and wax can burn in a very combustible way.

Take careful precautions!

So, here I am, warning you before you go any further, because this is a "use at your own risk" kind of thing!  I absolve myself of any dangerous results of burning these candles!!!!


 What you will need:
  • candles  ...cheap candles usually have a higher flammability factor, but I actually saw a beeswax candle catch fire once at a friend's party and believe me, it flared up fast.  Use the best quality candle you can afford
  • white tissue paper
  • a printer!
  • something to print.  Go on a Pinterest or Google image search and you can find lots of great things to print: French script, music pages, recipes, small flowers or other shapes
  • a hair curling iron
  • scissors
  • tea bags

What to do:


Prepare the tissue paper:  Use a few tea bags and pour boiling water over just to cover and release the tea.  Next, tint your paper irregularly by gently dabbing and brushing it with the wet tea bags.  The paper is very fragile, and can tear easily when wet, so be very light handed.  Allow paper to dry thoroughly.  If you are as impatient as I am, you can use a hairdryer to speed this along.  Cut the dried paper into 8 1/2" X 11" pieces.  Tape a piece to a regular sheet of printer paper along the lead edge (the top).


Prepare the image:  If you are using text or any image that has a right side view, create a mirror (or backwards) image.  This can be easily done in the Paint  software that is installed on most computers.  Simply copy and paste your image there and use the "flip horizontal" button.  Then, take your image back to Word, and paste it on your page.  I set my page layout to have 1/2" margins and then dragged the image out to fit the entire printable area.  The candles I used are very tall, and so I wanted to use the full length of the page.  Place the paper with the tissue side down, and print your page.  Sometimes this is a fiddly procedure, as printers are often finicky things and refuse to print or eat the page just to be spiteful.  Keep trying!   I was able to wrap three candles from one printed page, just determine how many you will need.  I printed an extra one just in case.


Prepare the paper:   I trimmed the top margin off the paper by cutting irregularly and close to the script.  I could have torn it, but since the edge becomes invisible this is not important.  Just get fairly close to the script.  Also, trim the left margin away.


HOORAY!!!!  Now the fun part!


Making the candle:  

Heat your curling iron.
Line up the candle alongside the paper making sure the script is right side out, and not upside-down.  Top of page faces the top of the candle, about an inch down from the top of the side of the candle.  Roll the paper with the candle until you can line up the lines of script, creating a free flow for the image.


Holding the tissue in place, begin to slowly run the curling iron over the edge of the paper.  The candle surface will start to melt and adhere the tissue to the candle.  You will see that the tissue takes on a translucent look and disappears into the candle when it is properly adhered.  Continue to burnish along the candle until the paper is well-adhered and you have nearly completed encircling the candle.  You may occasionally have to slow down and let the iron reheat.


Use your scissors to cut the tissue, allowing for a smidgen of overlap.


Next, burnish in the edge to complete the adhering process.  Inspect your candle to make sure it is evenly burnished and the tissue is translucent throughout.  As a final touch, Press your curling iron into the bottom of the candle to adhere the tissue to the base and fluting the edge slightly so it will fit into a candle holder more easily.


Friday, August 23, 2013

BedSack Frock

Yay!  I am making progress on the BedSack painter's style frock that I started a few weeks ago.  I was in a holding pattern for a while due to decisions regarding design.  I was really trying to keep in the neutral color range and colors just kept intruding into my plans.  Here are some photos and a few things I have done so far....


This is the frock with sewing done except for buttonholes.  You can see a little discoloration but this will not be an issue after I do some over-dying.


In this second photo, I show a close-up of the tall skinny pocket I added just for my reading glasses.  I have patched in some fragments of lace trim and leftover quilt scraps to make it a little more fun.


If you iron the shiny side of freezer paper to the back side of the fabric it will adhere and stabilize  so that you can paint of draw or write verse as I have done.  This happens to be a poetic sort of thought I had years back as I gazed out over a small mountain meadow as dusk was settling over the valley.  I thought I had enough room but got too expressive toward the end of the last of it and so it is not so perfect..

"Like bubbles in a glass of champagne, fireflies arose from the tall grasses of the meadow and twinkled away into the dusky twilight."

To complete the thought, I added machine and hand embroidered grass, and some rhinestone sparkles to simulate fireflies.  Here is the hoop I used for both the machine and hand work.  It is essential to keep the fabric taut so the stitches will not pucker the fabric.  There will be more updates as I move along with this garment, but I do not expect to be in a hurry with it.  I think it will be a work in progress for a long time to come.


Wednesday, May 15, 2013

Yes it is May Already!

I have some catching up to do.  Time seems to be escaping me altogether these days.  As I watch my
mother living in slow-motion, I feel as if I have been slowed to her pace and that is so unlike me.  I struggle with wanting to move faster, live faster, experience more and do more, yet I am caught in her web of Alzheimer's dementia.  The house is getting messier and we overlook that.  I will not beat myself up for not being presentation perfect, and I keep my own sanity by being creative when I can.  I tick off the months with my mantle changing.  May has heralded the arrival of many cardinals, and I feel as if I was given a special gift to be able to see there bright red beauty of cheerful crisp songs each day.  I fashioned my pair (and yes I know that I made two males) out of cardboard and pasted some old quilting scraps on and outlined with a Sharpee.  The birdhouse if also cardboard.  It was in my new waffle iron box, and just the perfect size to make into the house.  I fashioned after birdhouses my father used to make.  They were little crooked houses with an off-kilter roof and had crooked chimneys.  Very charming and he loved making them.  I wish I had one now just to place on a shelf somewhere.  My fiber art Earth mother is by an incredible artist friend of mine, Louisa Brown, who used my scraps to made her.  I have a house full of her early painting work, and this is the only sculpture project I bought from her.

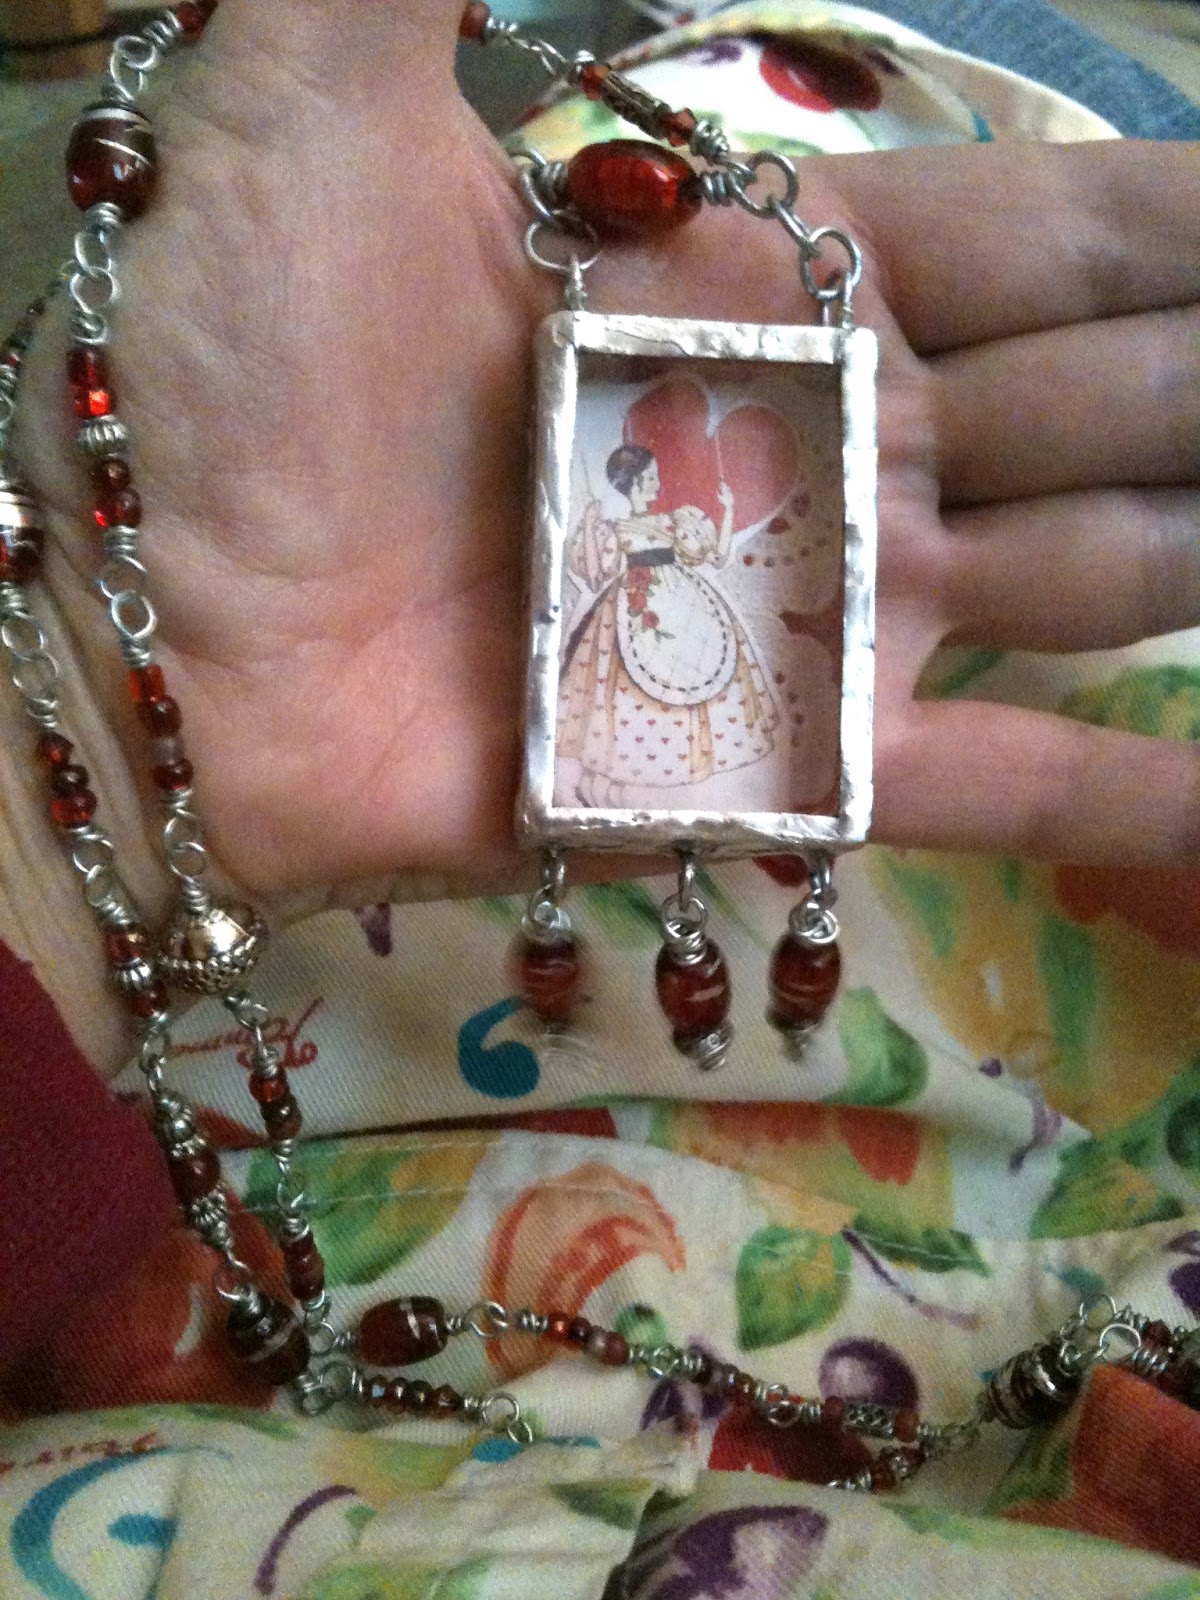
The red necklace is done.  I finished it a few weeks ago, but consider it still unfinished because I want to make a few layers to wear together.  I delayed over decisions for a focal piece.  What finally won out was a design that my sister, Melanie Renn, did for a Valentine greeting card many years ago.  I scanned the card and scaled down the image to fit the matchbox, which is lined with a scrap of red calico and a snippet of paper doily.  The piece came alive at that point.

Ostebro.se
The strawberry tunic is still in the mental planning stages.  Sometimes having something you consider precious is a drawback to moving ahead with re-creating a new life for it.  The fabric is a quilt top that I began when I first learned I was expecting my first child.  I had grand ideas of creating an heirloom baby quilt and traced strawberry designs over nearly all of the yard and a half of fabric.  I was new to embroidery like this, and used ONE strand of floss to do complete cover of the berries and leaves.  It was a far from practical idea, and by the time I delivered, I had only finished two areas and part of another, and I decided that if I kept at it, it might or might not be done for a grandchild.  Since patience is not usually one of my virtues, and I like to complete projects in a timely way, the quilt top got packed away, and surfaced very infrequently over the years.  My son just celebrated his 44th birthday a few days ago, so this has been hibernating a very long time. I fell in love at first sight with this tunic I saw on Pinterest.  It looks as if the floral design was drawn on after the garment was made, and a dash of paint added.  It seems a perfect way to create the old baby quilt top into something I would consider beautiful and useful.  So, I am considering how I will be cutting into the fabric and making the best use of the embroidery.   My thoughts are to do a white tunic over a red petticoat.  ...Maybe throw in some green and embroidered lace trim.  A new challenge arose while I was shopping fabric a few days ago.  The white is not white any longer, it has yellowed a little with age.  Also, most fabrics are now being manufactured in China, and are "crap."  They are sleazy and feel terrible even when they are 100% cotton.  I do not trust the dyes and other chemicals they use at all.  Prices are high for this garbage, and I don't intend to use it!  I will do what I can with my huge stash of real cottons, linens, silks and wools from now on. 


Monday, March 11, 2013

Shabby Chic or Turning Vintage


Recently, one of my virtual friends described achieving a certain age as "turning vintage."  I love that phrase "turning vintage."  It has such wonderful connotations of getting better with age just as fine wine does.  Along with the aging process, those bottles may gather dust and labels may fade or scratch.  There is a bit of the shabby chic in that description too.  Isn't that a great way for us to describe things that fall out of place and get comfortably rearranged?  Just out of curiosity, I Googled "shabby chic" and found a decorating site with guidelines for styling Shabby.

  1. The first rule is to "go white."  Well, my hair is doing that quite well, and even skin tone begins to pale.  What can I say?  ...I stopped sun worshiping years ago, and I really detest hot steamy southern summers.  I'll choose the air-conditioner any day.
  2. Second is the extravagant use of slip covers to hide wear and tear.  So, as with furniture, so I have started to drape myself with various garments designed to hide muffin top bulges and body parts that have been drooping, as well as all that other stuff like veins and scars that seem to have accumulated out of no-where to paint my body canvas.
  3. The third criteria is tea-stained fabrics.  Ha!  Tea, coffee, spaghetti, grease spots, everything I eat seems to leave a mark down my front as though I am keeping a food journal.  Ummm, what did I eat earlier?  I don't even have to try to remember, I just look down at my belly and there it is!
  4. Next up is "over-stuffed" upholstery.  Hahahaha! " ...Comfortable, slip-covered, rumpled, ruffled, and rounded, ...Muffin top?  ..."  'Nuf said!
  5. Then they talk about distressed paint.  Anyone "vintage" that wears glasses and tries to apply make-up knows how hard it is to apply just the right amounts so as to look natural.  Oh the sad stories I can tell about the rouge-cheeked old ladies that looked like Boopy-Do dolls to me.
  6. What about "Architectural Details?"  Well, go old.  Yeah, what worked when we had lovely chests and firm fannies,slim bodies, and various parts we were taught to showcase, paired with growing incomes to supply all sorts of cute little outfits, has all changed.  The closet has been slowly clearing out of those cute little tops that show it all off, and the tight little jeans have been replaced with baggy.  Incomes slowed down and and so did we.  Contentment set in with our well-loved old shoes and comfy clothing.  Now we are becoming authentic!
  7. Old and imperfect.  Jeweled accessories are turning with patina, and styles have changed-over many times.  If a chain breaks then we hang a locket from a ribbon.  Rhinestones fall away, yet the beloved adornment still holds a memory and feelings for you.  We don't see them as other do, and nor should we.  We hold on to these and love them still.
  8. Gravitate to comfort.  Let things get rumpled and unsorted.  Don't worry about complete order and shine and perfectness.  It's not quite possible now anyway.  I love my former mother-in-law once telling me:  "It's something of a blessing that our eyes start to go as we get older.  ...We can't see all the dirt then."  I can't tell you the shock I go through every so often when I put on some strong readers and visit the bathroom and see dust everywhere, or the spatters in the kitchen.  It really does take Herculean efforts to keep a house perfect and tidy.  There is nothing wrong with a lived-in look around here!
  9. The site's author mentioned that metal makes it all look better.  So, draping myself with original metal-work has been my mission lately.  I love my crude wild jewelry.
  10.  Patchwork!  I have always had a reverence and love for patchworking.  Those crazy quilts of Victorian times amaze me with their charm.  Now I am becoming a walking patchwork design.   


Combinations of everything I love and hold dear now are taking precedence in my home and on my person.  DO I care what you may think if you are to visit here?  Maybe a little, but not like I used to.  Now it is about what I like and makes me feel good.  I have always wanted to surround myself with things I have made and love or that have meaning for me.  So. now more than ever I slap colors on the walls and have an eye for what makes me happy rather than all those rules of design and proportion.   I pull arrangements together that no-one but I understand.  Vintage me understands this and glorifies in it.  Yes, what better time is there to really get to know myself and honor that?  It takes a lot of forgiveness and acceptance as well as patience and self-knowledge and what really matters.  Call me Crone, call me Vintage, or call me Becoming Enlightened.


* This blog was inspired by this site:  10 Elements for Shabby Chic Decorating


Tuesday, August 24, 2010

"THE " Jacket


No ordinary piece of clothing, this jacket of mine has led many lives. It began it's first life in the 80's when Don Johnson starred on Miami Vice, and his scruffy face and casual linen jacket were all the rage. One of my sons wanted a linen jacket, and so that is how "THE" jacket came home with us. He quickly outgrew it, and the jacket fell out of fashion, as the hard rock era and its demonic and gore style emerged. Being a fabric snob, there was no way I would ever get rid of a linen jacket, and after several years of gathering dust in a closet, I got it out and narrowed the shoulders. ( The 80's had crazy wide shoulders.) Then, one day when my granddaughter was 3 years old, I got the idea that we ought to paint it together. ...And that is what we did. It was a blast! Flowers, smiley faces, Ohms, circles, hearts, an engagement ring and a rocket ship, in many shades of metallic and sparkly fabric paint, all found a place on "THE" jacket. It became my most beloved and frequently worn garment for the next 20 years, and it got the compliments nearly every time I wore it. A few times over the years, I found it necessary to do some touch up painting. Last year, I noticed that there were a few places where heavy use had left some edges fraying. No problem! I used satin ribbon to re-face the neck edge and the tops of the pockets. I also had to cover the sleeves where the rolled up cuff hem was. Then, three weeks ago I washed it again. As it was being pressed, I noticed to my shock that the fabric itself was now beginning to give out. Looking at it made me so sad that I had to put it away for days while I racked my brain as to what course I would take this time, and would it be worthwhile. Well, I missed my jacket! ...and the decision was made that any course of action was definitely worthwhile.

Tuesday, August 17, 2010

An Old Pair of Jeans Gets a Facelift Resurection ...or Too Much Is Never Enough!


I have an old pair of Lee jeans. They fit perfectly. They are so soft and comfortable that I live in them. They are several years old now. They have been patched with iron-on patches to help keep them together at the seams, but now, the fabric is getting so thin that it has given way over one knee, and the crotch is shredding apart, ...and I am not ready to give them up even though I hesitate to wear these jeans anywhere out of the house now for fear of a blow out that would certainly leave me facing public humiliation. I have devised a few plans to deal with this possibility. One solution has been to iron patches on the underside, ...and patch, ...and patch, ...in order to give the illusion that they are still new and wearable. I suspect that I am only fooling myself. Another solution is to wear a mini-skirt over the jeans to provide decency in case of a rip out.

Yesterday, I got the new September issue of Elle in the mail. Lots of jeans! Some even had patches featured, and got me to thinking of my quilting days and fascination with patchwork embroidery. It has such a rich history, and Victorian times provided a height of embellishment. The Victorians must have had a philosophy of "too much is never enough!" There has never been as much popularity in ripped up jeans as there is now. My grandson won't buy a pair unless it is properly ripped, and it's a happy day when the hem gets caught by the bicycle chain and it bites a chunk out. For myself, however, I prefer a less chewed up, grubby style.
Anyway, my old jeans need revival. I plan to share the transformation with you.

Saturday, July 31, 2010

Creating Aruba in a Necklace


Barnacles, Bubbles & Pearls in a Fisherman's Net


First of all, I have never been there, but I loved seeing photos of the clean white sandy beaches and the beautiful greenish tint to the coastal waters of Aruba. Now that the sweater has been finished, and I am eagerly waiting for the weather to get cooler so I can wear it, I am faced with how to companion it. Challenged with redesigning my wardrobe, I look into the closets and drawers and see nothing! It seemed a natural turn that because one of the knit-a-long requirements (that I imposed on myself as well as everyone else), is that the knit creation have embellishment. Well, sometimes a piece of art just needs to be kept simple. SO, I decided to be complete with the knitting. However, not quite satisfied, I took a notion to accessorize with a necklace. Never having been one to hesitate doing something because I never tried it before, I jumped in fully committed. Although I have experimented at beading simple strings of jewelry, as just about everyone else has, I have never done something encrusted with beads. The necklace became like a project I have seen in Belle Armoire, a beautiful magazine for bead crafters. This necklace has been daunting. Just a jewelry dabbler, I have to learn, or create ways, to put this together that has had me researching throughout the process.

The inspiration concept that was my beginning point was that of a fisherman's net. Using some old corks saved form a celebration deeming champagne, I cut the corks in two, shaped them into beads and drilling holes. Then, I knit a net of silver metallic crochet cord. and attached the cork "floats." I attached the ends of the silver net to a chain, and began the process of encrusting the piece with barnacles of seed beads, shell palettes, irregular pearls, and silver and glass beads.