Showing posts with label tutorial. Show all posts

Wednesday, March 4, 2015

Mirror, Mirror On the Wall

It has been since the end of last year that I have been working on creating a studio.  Even though it has been painfully slow, I have been sharing the experience with you.  Now, it suddenly seems to be pulling together.  I have a theme and a direction that was missing before this week.  So far, it has been driven by a desire and thinking process, and once I got more focus, I had direction.  Hooray!  What I wanted was:
  • a fun, playful place to create that made me feel happy and creative just to enter the space.
  • an organized and dedicated space
  • a place that symbolized my most positive feelings and nurtured my spirit
  • a place that I would be happy to spend time every day
  • a work area that took care of my creative and physical needs
  • a small, attractive and exciting space for display, to house jewelry that I make for sale so that customers can look easily and soak up atmosphere and feel the goodness
In order to accomplish all this, what I needed to do was some soul searching and a lot of research.  It is not something that can easily be thrown together, and unless an artisan has been at their craft for years, it is not easy to know all that is required.  I have been moving slowly because I wanted to make sure I purchased wisely and set up the space right the first time.  This is especially important for the walls, which newly faux-painted, will have to hold shelves, display pieces, and other invasive equipment.  If I wasn't careful, they would look like Swiss cheese.

One thing I knew I wanted was a mirror. I had an old one that I don't even know from whence it came.  It was a dark and plain wood frame, so I added decoupage.  I wish I had thought to share that process with you, but I get so ahead of myself at times and there is no slowing me down.  The first thing I did was to paint the beveled edge of the frame nearest the mirror with copper metallic paint (cheap from the craft store) and allowed that to dry thoroughly.  Then, I applied leafing adhesive and added gold leaf.  The next step was the decoupage.  I used a wheel cutter to cut straightedge strips from wrapping paper, wide enough to wrap to the back of the frame.  The top of the frame was painted in manageable sections with wood glue. I got that at  Lowes at $4 for a rather large bottle.  The glue was thinned just a little with water with just enough to flow easily but still be tacky and not runny.  I placed the strips at the beveled edge and smoothed them down on the top.  The next day, the process was repeated for the sides and around the edge of the frame to the back.  This two step process allowed the top to dry and have a strong hold to keep the paper from sliding out of position.
Giving the decoupaged surface yet another day to dry, I then covered the entire surface with a coat of Mod Podge.  Just one coat, because I am not a fan of high gloss surfaces.  I want the room to have a cozy up-cycled artsy vintage feel.  Please pardon the reflected junk on the other side of the room, it will be gone soon, as everything shapes up.


Wednesday, January 1, 2014

French Script Candles


Here it is as promised!  These candles are reallyeasy and so lovely to look at.  However, and this is a BIG however, they must be used with great care.  Because they are wrapped with tissue paper, they are a danger for fire flare, and wax can burn in a very combustible way.

Take careful precautions!

So, here I am, warning you before you go any further, because this is a "use at your own risk" kind of thing!  I absolve myself of any dangerous results of burning these candles!!!!


 What you will need:
  • candles  ...cheap candles usually have a higher flammability factor, but I actually saw a beeswax candle catch fire once at a friend's party and believe me, it flared up fast.  Use the best quality candle you can afford
  • white tissue paper
  • a printer!
  • something to print.  Go on a Pinterest or Google image search and you can find lots of great things to print: French script, music pages, recipes, small flowers or other shapes
  • a hair curling iron
  • scissors
  • tea bags

What to do:


Prepare the tissue paper:  Use a few tea bags and pour boiling water over just to cover and release the tea.  Next, tint your paper irregularly by gently dabbing and brushing it with the wet tea bags.  The paper is very fragile, and can tear easily when wet, so be very light handed.  Allow paper to dry thoroughly.  If you are as impatient as I am, you can use a hairdryer to speed this along.  Cut the dried paper into 8 1/2" X 11" pieces.  Tape a piece to a regular sheet of printer paper along the lead edge (the top).


Prepare the image:  If you are using text or any image that has a right side view, create a mirror (or backwards) image.  This can be easily done in the Paint  software that is installed on most computers.  Simply copy and paste your image there and use the "flip horizontal" button.  Then, take your image back to Word, and paste it on your page.  I set my page layout to have 1/2" margins and then dragged the image out to fit the entire printable area.  The candles I used are very tall, and so I wanted to use the full length of the page.  Place the paper with the tissue side down, and print your page.  Sometimes this is a fiddly procedure, as printers are often finicky things and refuse to print or eat the page just to be spiteful.  Keep trying!   I was able to wrap three candles from one printed page, just determine how many you will need.  I printed an extra one just in case.


Prepare the paper:   I trimmed the top margin off the paper by cutting irregularly and close to the script.  I could have torn it, but since the edge becomes invisible this is not important.  Just get fairly close to the script.  Also, trim the left margin away.


HOORAY!!!!  Now the fun part!


Making the candle:  

Heat your curling iron.
Line up the candle alongside the paper making sure the script is right side out, and not upside-down.  Top of page faces the top of the candle, about an inch down from the top of the side of the candle.  Roll the paper with the candle until you can line up the lines of script, creating a free flow for the image.


Holding the tissue in place, begin to slowly run the curling iron over the edge of the paper.  The candle surface will start to melt and adhere the tissue to the candle.  You will see that the tissue takes on a translucent look and disappears into the candle when it is properly adhered.  Continue to burnish along the candle until the paper is well-adhered and you have nearly completed encircling the candle.  You may occasionally have to slow down and let the iron reheat.


Use your scissors to cut the tissue, allowing for a smidgen of overlap.


Next, burnish in the edge to complete the adhering process.  Inspect your candle to make sure it is evenly burnished and the tissue is translucent throughout.  As a final touch, Press your curling iron into the bottom of the candle to adhere the tissue to the base and fluting the edge slightly so it will fit into a candle holder more easily.


Monday, July 30, 2012

Twiddling Thumbs Gets Nothing Done


This week has been a time of resting up a little.  The DH has been on a mini-vacation since Wednesday, and both of us needed R&R.  We have been so busy taking care of things that have to be done that just staying home and having a movie marathon sounded good to both of us.  Unlike our past "stay-cations" in which we did a little bit of local traveling and sight seeing, we thought it would be easier on both of us if we did not try to take my mother out every day.  Now 97, and deeper into Alzheimer's Disease, we never know what to expect from her health-wise or in terms of attitude.   Also, I just don't feel like pushing a wheel chair even 5 feet in the 100* heat we are having.

So, you should know by now that I do not just sit twiddling my thumbs.  I have been busy working on the chair swing, patching the other pocket of The Jacket, and sewing up a tunic which is up-cycled from an old tank top, matching shorts, and similar color knit capris.  I have had these three items for years, but have not worn them in forever because they "got little."  I could have worn them, but I hate seeing a of any age woman stuffed into her clothing.  As far as I am concerned, it is seriously deeming to her dignity and speaks volumes on her self worth.  Clothing should add grace, mystery and beauty, and there ain't no way that defining every bulge and cellulite dimple does that.

Because the tunic took too much thinking as I designed it, I didn't take photos of the stages it went through, but it is easy enough to describe the process.  The first thing I did was to remove a label that was sewn to the front of the tank top.  I am not at all big on wearing someones labels on my clothing.  I knew I would slip up with this and made a few tiny holes in the knit.  Yes, this could be a disaster, but there is a great product called Fray Check that will stop unraveling in T-short knits.  I used to use it often on my son's T's because they always got holes where they were tucked into their pants at the front waistline.Then, I picked out a stitched on logo from the shorts.  No holes this time!  Next, I cut the waistband from the shorts, and cut the two front and two back pieces apart along the seam-lines.  I was careful to preserve the pockets.  The waistband is a folded ribbing with a drawstring, and I decided to use it along the waistline seam when joining the "skirt."  I actually cut it in half the long way, and extended it by sewing the two halves together, and then cutting it to fit the hem of the top.

For the skirt portion, I cut the shorts pieces straight down from the center front and back seam-lines, removing the crotch areas.  The legs of the capris were cut into elongated diamonds and sewn in at center front and back as well as the side seams.  I only needed to hem the diamonds as the shorts already had the hems.  After sewing the waistline together, all that was left was to thread the drawstring through, and then patch some pieces onto the holes on the front of the top.

I have already worn this over black capri length leggings and tank top, but plan to wear it under my Aruba sweater when weather gets colder, with either tan leggins or pants.


.

Thursday, July 12, 2012

THE Jacket Again

Well, when you just keep wearing a garment, it does wear out.  This is one I keep resurrecting every spring now.  This time it was a blown out pocket that required patching.  Here you see the hole next to the last repair that resulted in a lace applique.  A little tricky because it was the bottom of the pocket and I wanted it to be solid enough to push my hands into another 20 years.  So, I am going to take y'all through the steps I used.

Other than my sewing machine, iron, and the hole, here is what I needed for the repair...
  • iron-on woven interfacing
  • an old left-over flower applique with Stitch Witchery fusible web already applied
  • not shown: non-stick ironing sheet (keeps the glue away from the iron!)


1.  I cut the woven interfacing to fit the inside bottom of the pocket, all the way to the lace flower applique, which overlapped the pocket edge.


  2.  I cut the stitching along the bottom and side edge of the pocket so that I could insert the interfacing properly.  Then, I ironed the pocket (from the right side, following directions for fusing interfacing) to fuse the interfacing to the back side of the pocket.  Once cooled, placed the flower applique where I wanted it to be and pressed just the pocket (not the garment front) to fuse it to the pocket flap.  I lifted the pocket flap to sew on the flower applique.  This did require care so as not to be sewing through both the flap and the jacket front behind the flap.  Remember that it was already sewn down previously.  I did not want to  shorten or close off the pocket any further.  Luckily, I was able to sew it all in as planned.  The lines for the zig-zag design were drawn on to the flower piece with a white pencil.  I sewed some of them through both layers of fabric where the two appliques overlapped.  The flap was lifted away for the rest of the flower patch.

3.  Once that was done, I wanted to make sure that the interfacing would not separate from the fabric, even through years of pocket pushing and washings.  I assured this by stitching back and forth across the area where the interfacing backed the pocket.  All that was left after this was to replace the pocket in position and sew it on along the original pocket line.

Now my well-worn and loved jacket can keep on for another season, and hopefully years to come.  Every time I wear this jacket I am reminded of my beautiful granddaughter, who is now a grown woman.  In this jacket, she lives on as the tiny tot who was so enchanting and stole my heart.

For the story about this garment, read this blog:  THE Jacket story


Friday, July 6, 2012

Studio Re-Do #3

OK, so I have had many things going on and the studio is advancing at a snail's pace.  However, I managed a quick fix in very short time this morning that I want to share with you.  I have seen several photos on Pinterest that show off some clever use of homemade chalkboard paint.  Some are chalkboard walls, old silver trays, and some are just painted boards in a  frame.  I chose the latter for my project.  I had a nice gilded frame sitting around waiting for a picture to beautify, but no board to fit.  Taking myself off to the craft store, I found that the canvas boards were sold in packs and would cost me far more than necessary.  So, I grabbed up a white foam board for this project.  Now is where I get experimental.


All the Pins I was used un-sanded grout mixed with regular latex paint.  I had checked with the local Lowe's, and saw that a small bag of grout was about $13.  Not bad, but all the recipe called for was about a teaspoon of grout, and that just seemed ridiculous to me.  So, after a friend suggested that joint compound would probably work too, I mentioned I only had the already been mixed kind.  "No matter" said my friend, and I am glad I listened.  I had this big tub, and some deeply purple paint to play with.  I mixed about 1/2 cup paint with a generous amount of joint compound (perhaps 3 Tablespoons, I did not measure), and spread it on lightly with a small trim roller (though just about any way of application would do).  I smoothed it out afterwards with a very light brushing over the surface.  It dried very quickly, without much warping of the foam board.  I gave it another coat after an hour or so. 

 This is the result...

Sunday, June 3, 2012

Studio Re-Do Step #2

Well, I cannot lie, there has been too much going on the past few weeks to move forward with the studio.  I had to renew my business license, and that required me to take another course.  I decided on Past Life Regression hypnotherapy.  It didn't take very long, but I took my time.  It was more enjoyable than I would have imagined, and a book that was momentous for me was The Journey of Souls by Michael Newton.  It was amazing for me because from my own background it felt like the real deal.  Now, I just happen to believe that we all keep coming back over and over, and I also believe in hypnosis.  If you believe in neither, then this book would be meaningless to you.  If you are a believer, I highly recommend reading it.

Now that I have certificate in hand, and there is an itching for creativity again, I want to share this quick project that must have taken only 30 minutes to make.  It seems to be my lot that I will bring Mother Nature into the house when possible, and here is what has become of a branch that came down this winter.  I just neatened up the ends a little with a hand saw.  Then I used packing twine to wrap close to the ends, making a loop at each end before tying knots.  Being careful to preserve the abundant lichen growing over the length of it, I screwed in several cup-hooks that I rummaged out of the kitchen junk drawer.  Then, I decided where I wanted to place the screws it would hang from.  I did one end first, and then a pencil through the other loop and marked the wall for the other side.  I used my trusty electric drill and toggles for this task.  It could be done other ways, especially if the wall you want to mount this on is solid.  I am not very good about finding studs without piercing the drywall with a myriad of tiny holes, so I use toggles.  The plan is to get more cup-hooks and hang more jewelry.  I can also hang other things as it is quite strong.  ...And by the way, the picture of dolphins playing in sunlight streaming through the ocean depths was done by artist Louisa Brown.  She is a good friend and I have many of her earlier works on display in my home. 

Wednesday, May 2, 2012

Giving New Life to the Porch

Just a quickie post to show you a very fast, fun, and funky decor fix for my porch.  I am still waiting for the storm of pine pollen to end to give it a good cleaning and it needs paint this year too.  However, after seeing a few ideas from others, I had the idea to use an old mini-trellis that was almost thrown out to provide a little privacy and beautify the view as well.  The neighbors behind me have recently turned their back yard in a plastic junkyard for their toddler, and I really do not like an unnatural view.  We bought our home 10 years ago becasue of the natural setting, a nearby pond and its wandering ducks and geese, the quiet neighborhood, the birds, and it seemed perfect.  So, to block out the plastic playhouse, two bicycles, 3 plastic push-mobiles, plastic basketball hoop, and plastic sandbox, I grabbed the trellis, slapped some paint (really just using up the paint on the brush, shabby style) and hung it from the braces holding a planter.  I wired on a pin-wheel, a prism, and two wire and glass dangles.  I can change the objects when the whim takes me.  I can use small flower pots or vases, sun-catcher mobiles, small wind chimes, ...really, the ideas are endless.  I have two more of these old trellises, which I plan to use, and more ideas for how to make them fun to come soon.


Friday, April 20, 2012

Studio Re-Do

Now, with taxes finally out of the way, I can let my brain wander back to creative pursuits and believe me there are plenty of ideas waiting to be born.  For an embarrassingly long time,  I have wanted to clear the clutter from my studio and create a wonderful space for designing and dreaming up new projects.  With so many creative artisans out on the web now, inspiration is often just a click away.  Feeling rather low a few days ago, as Murphy's Law seemed to be preventing me from the simple task of e-filing and printing out my tax forms to mail, I took a break on Pinterest and found a beautiful photo of Tammy Gilley's studio.  Imagine my joy at finding that she has blogged her studio re-do with before and after photos!  I could hardly believe that her studio was nearly as cluttered as mine where just walking through is a serious challenge.

I have decided that I am going to reward myself with my own studio re-do, and share the process with you here over the coming weeks.  With this promise, perhaps I will stay on track and actually finish.  I have begun my re-do with a very simple project to organize my growing stash of beads.  This has been part of a plan for a while now, and a reward to myself for getting through taxes.  I found a huge oil pan, the kind use use under a car that leaks onto the garage floor, for $12.  You can find these in various shapes and sizes, but this was the largest and the least expensive.  Also, and very important is that it HAS to be magnetic.  Take a small magnet shopping with you to test the metal.

Now then, since the pan is galvanized steel, it can be subject to rust.  Because of this, I did not want to screw it directly to the wall.  I had on hand some rubber faucet repair washers, and used them behind the pan to raise it off the wall (glue in place).  I used long screws that I had purchased complete with toggles and drilled a hole in each corner of the pan large enough for the screw to pass through easily.  Before gluing the washers on, I used the pan as a guide to mark the wall where holes needed to be.  After drilling holes large enough to insert the toggles, and getting the toggles hammered into the wall, I then held the pan in place and tightened down the screws.  As you can see, my pan sits right behind the door.  It is a perfect fit, and does not protrude to interfere with the door standing open.  I can easily reach any of the tins here, and the rest of the wall space is open for decor or other storage.

Next, all that was needed was to add the tins to hold the beads.  Since my daughter-in-law had already done a project like this for her spices in the kitchen, she had done the shopping legwork and I knew right where to find the best deal.  Michael's Crafts had them in the bridal favor section of the store in a tub holding 30 tins for about $17.  Since they were on sale when I went in, I bought three of the tubs because I have quite a lot of beads, and the pan will hold all of these and perhaps even more.  My DIL used magnetic tape for her tins, but I was concerned about the weight of the beads, and a quick inquiry with a salesperson confirmed that the tape was not magnetic enough to keep the bead tins from sliding.  So, instead I purchased small round magnets, a pack of 50 was $7.  

Using E6000 glue -in a well ventilated area! I placed a small dab of each magnet and popped it on the center-back of a tin. Patience is the next step.  Gotta give the glue time to set up properly before placing it on the pan or the tin will fall off the magnet.  ...Yah, I am not known for patience.  I had some tins that already held beads, but I highly recommend doing the gluing before filling the tins.  These tins are not very substantial, and will require gentle handling, so filling them before the glue just complicates things a little.

Once the glue is really set though, you are ready to have fun placing and organizing the tins on your pan.  I have not completely filled all mine yet, as I got so excited that I wanted to post this immediately, telling the world about the beginning of my studio re-do.  The plan is to organize them by color and type.  I can't wait to see them all in place, with an at-a-glance view of what is available for my projects.


Wednesday, June 30, 2010

Pink Ruffles and Shabby Chic


Several years ago, when I bought a queen bed, I made a duvet cover for my feather comforter, using an abundance of very old green and white cotton seersucker, cut into squares. I purchased a set of pink and white striped twin sheets, which I cut into squares and strips, and sewed them all together. Teaming this duvet with a set of pink sheets and some additional green bordered pillowcases made for a beautiful combination. However, while folding my clean sheets last week, I noticed that my pink pillowcases were becoming frayed along the edges. ...Yes, I must have had my glasses on at that moment, or it would have passed unnoticed. This fraying did not have me tossing them out and making a mental note to go shopping. With lots of wear left in the sheets, I certainly wanted to extend the use of the cases. Here is where not throwing anything away can pay off! Instead, I got out the sewing machine and remnants of fabric and made them new again.

Here is how I did this (Please pardon some of the photos that came out on the dark side)...

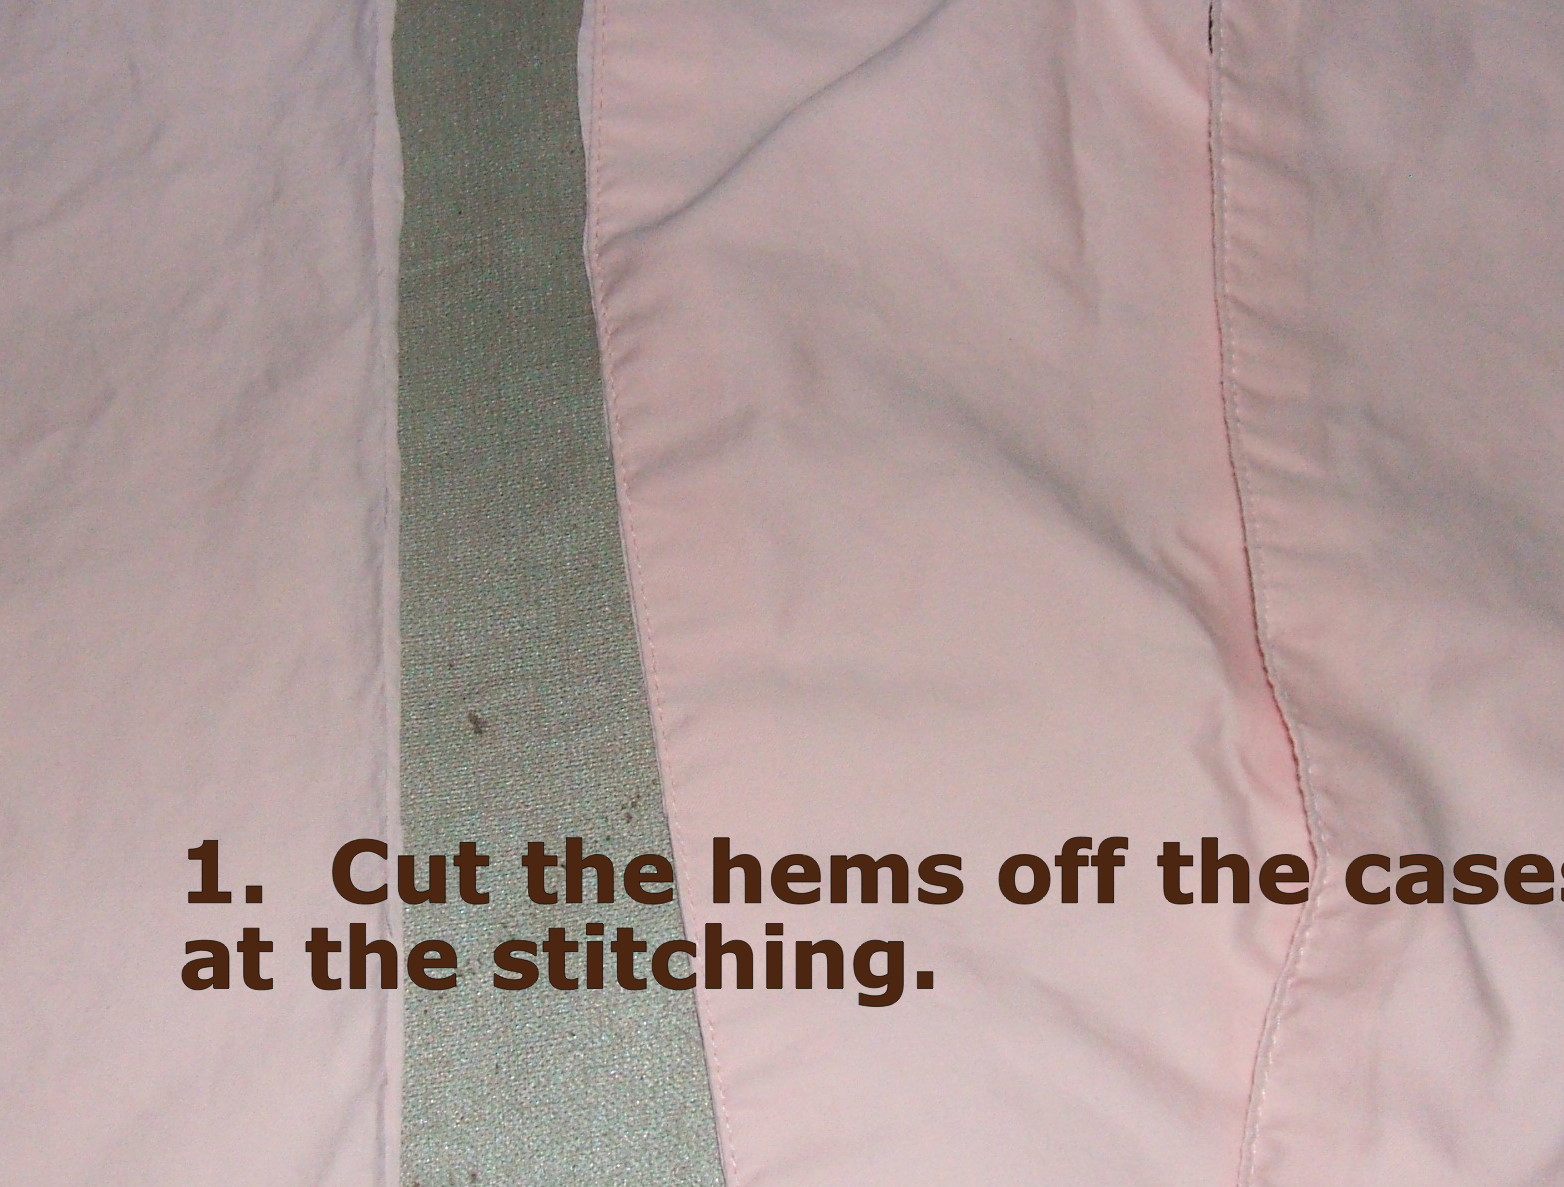
1. Cut the hems off your cases at the stitching.

2. Then, cut a strip of your ruffle fabric that is about 1.5 inches wider than your hem measurement.

A nicely flouncing ruffle is achieved by using the rule of thumb of cutting the strip 1.5 times longer than the edge you are sewing it to. For a very flouncy look, be more generous. Mine follows the rule of thumb.


3. Hem one edge of the ruffle strip, by turning 1/4 inch to the wrong side and pressing it flat. Then, turn it again, so that the raw edge is hidden, and press again.


4. On the opposite edge of your ruffle, run gathering stitches. This is done by sewing with the right side up, and having two rows of stitching, about 1/4 inch from the edge, and again 1/4 inch away from the first row. Gathering stitches will be the longest straight stitch setting on your machine.


5. After you have done the gathering stitches, then mark your ruffle by pinning each end as it lies flat. Then, match up the two pins, and lay it flat again. This will give you another halfway marker, dividing it into quarters.

Mark your pillow case edges in the same way.

6. Now, match up the markers and pin the ruffle to the case. Match the seam of the ruffle to the seam of the pillow case, and make sure that the right side of the ruffle is facing down against the right side of the case. The stitches that are viewable to you will then be gathered up by pulling the same ends of each set of rows, simultaneously, so that they will pull in evenly. Work slowly, and arrange the gathers so that they are evenly distributed between the pins. Be sure that the gathers are not so tight that they are tighter than the case.


7. Finally! Sew your ruffle to the case, with your stitching line just above the 1/2 inch gathering row, using a normal stitch length. This row of stitching is between the two gathering rows. Then, use an overcast or zig-zag stitch to finish the raw edges. Now, you can pull out the gathering stitch row that is outside all the stitching. Trim the thread ends, and turn and press your ruffle seam toward the casing side.

8. The final step! Do a row of edge-stitching, which is simply a row of normal size stitches, that are very close to the seam, or about 1/8 inch away on the casing side. This will hold the seam in place on the inside and keep a crisper look.


Tuesday, September 30, 2008

Not just another stitch marker…

I HAVE THIS NEED TO BE DIFFERENT. I really cannot tolerate sameness in myself. It’s OK for others, but if life doesn’t have extravagant variety, then why do another day? So, in seeking the more unusual, creative, and colorfully unique, I have taken roads less traveled by others. Blame it on my inner gypsy. I call her Shalimar. Shalimar has the quality of a multi-faceted crystalline jewel. She appears to be different from every angle. Sometimes she’s raw and uncut by nature, often childlike and playful, and other times polished and classy, …but always unique. At times, she can be very demanding, and make me do things “the hard way,” and sometimes she gets me into trouble. …Consider the time she had had enough of a painful and confining marriage and ran off to California and learned how to do acupressure massage and play with energy. …Or the times she just had to go to China. …And how many other brides have Chinese Lion dancing at their weddings? …Especially when they aren’t even Chinese? (She said that a wedding ceremony should be meaningful and fun for the groom too, and when one marries a devoted Kung Fu man, that’s the sort of thing to do.) One thing for certain, following my inner gypsy has made life very interesting. She is responsible for these stitch markers: I absolutely advocate making your own stitch markers. They are so much fun and easy to do, and allow you the opportunity and freedom to express your own inner desires for creativity.

What you need:
beads of your choice, size 18 gauge wire, and a set of inexpensive beading tools (round-nose pliers, wire cutters (an old scissors may do), a small hammer, and an old metal knitting needle larger than the size you will be knitting with. I have two different sized sets of markers. One is for larger needles, and the other I use on needles up to size 8).

What to do:

  1. Determine how long you will need to cut your wire by doing a demo. I cut mine about 8 inches long.
  2. Start by winding the wire around the round-nose pliers to create the center of the spiral. Then, hold the center between you thumb and fingers, and begin turning to wrap the wire around the center. Deviate as you wish. However, do keep in mind that by keeping the twists and turns as compact (less open) as possible, will minimize the stitch marker getting caught in your knitting. I have learned NOT to use these with any lacey knitting. The combination is impossible. Hammer this part gentle to flatten it slightly. This will help keep it in shape.
  3. Add your beads as you wish. It is best not to have a dangle that is long or heavy.
  4. Hold the top of your dangle with the needle-nose pliers so that it is snug. Then, bend the wire at a 90-degree angle. Hold the top of the bent wire close to the bend. Wrap the wire around the pliers near to the size of your knitting needle. Insert the knitting needle, adjusting the size of the circle.
  5. Holding the circle firmly, begin to wrap the wire around its stem. Wrap closely, and snip it close with the wire cutter. Smooth the end into the stem so that it will not catch, feeling even to the touch.

Sunday, August 3, 2008

Tunic Tank Pattern


Here it is, …the tunic pattern. I made it up as I went. It is very basic, and an easy one to follow, as it really doesn’t need a lot of directions. I used yarn that I recycled from 2 sleeveless shells bought on sale. The 100% cotton yarn was in the sock weight category. It was a little loose, about 3 or 4 ply, with very little twist. I used large needles to create a very drapey and open fabric. As I got to the armhole area, I switched to smaller needles to close up the stitches and firm up the fabric, as well as make the pattern smaller without decreasing a lot of stitches. It creates a gentle gathering and a nicer fit over the bustline.

This pattern is not for commercial purposes, and is protected by copyright.

Materials:
Needles: sizes 11 and 8 (US) circulars
Yarn: about 1000 yards sock weight
Stitch holder
Stitch markers for both needle sizes
Gauge: 6 stitches to the inch with #8 needles, but this is really not too critical as the garment is meant to be loosely fitted, it is only included to give a better representation of the yarn.Directions: Front and back are knit exactly the same. Entire garment is knit in stockinette stitch.
Front:
With #11 needles, CO 100 stitches. Continue with stockinette stitch for 13”. Slip these stitches to a holder. Set aside and begin the back.
Back:
With #11 needles, CO 100 stitches. Continue with stockinette stitch for 13”.

Pick up the front, placing stitch markers at both side seams, and knit front and back together in the round. Use stockinette stitch until it is as long as you want it, finishing your row at the sideseam join. Hold it under your armpit to judge this. My tunic measures about 8”. Pay attention to the depth of the armhole (that is, do you want to wear a cami under this and have a deep armhole, …or do you want to be able to wear this on its own and have a closer fit?)

When it is the length you desire, begin the armhole shaping for front and back: BO 3 stitches, continue across “front,” BO last 3 stitches, purl next row, BO 2 stitches and knit across back, BO last 2 stitches. (88 sts each side) Purl row. On following knit row, decrease I st at each side. Purl wrong side row. (86 sts)
Switching to #8 needles, Knitting across right side, begin deceasing. Use stitch markers if needed. Finding the center front (or back), divide up into groups of 10 stitches, with odd stitches at each edge. (13, 10, 10, 10 (center) 10, 10, 10, 13)

Knit right side rows:
K 11, ssk, * k8, ssk, * 3 times, * k2tog, k8 * 3 times, k2tog, k11. Purl row wrong side.
K 10, ssk, * k7, ssk, * 3 times, * k2tog, k7 * 3 times, k2tog, k10. Purl row wrong side.
K 9, ssk, * k6, ssk, * 3 times, * k2tog, k6 * 3 times, k2tog, k9.

Purl wrong side row.
K 8, ssk, * k5, ssk, * 3 times, * k2tog, k5 * 3 times, k2tog, k8.
Purl row wrong side.
K 7, ssk, * k4, ssk, * 3 times, * k2tog, k4 * 3 times, k2tog, k7.
Purl row wrong side. (52 sts)


At this point, we are ready for the neck edge!

Neckline shaping (same for both front and back): The following rows are stockinette, and at this point, it is time to begin the neckline shaping. Again, find the center of your row.

Knit 21 sts, BO 10 sts, k21. Purl wrong side. Left side: Knit 1, ssk, k19. Purl. K 1, ssk, k18. Purl. Continue in this way, decreasing at neck edge for 13 rows. (8 sts left)
Right side:
Knit 1, k2 tog, k19. Purl. K 1, k2 tof, k18. Purl. Continue in this way, decreasing at neck edge for 13 rows. (8 sts left)Continue to knit and purl until you reach the proper length for your armhole depth, BO. (I did 12 more rows.) Repeat for opposite side.

Sew shoulder seams. Pick up stitches around the armhole and neckline, doing 2 rows of knit stitches to neaten and firm the shaping.