Showing posts with label upcycle. Show all posts

Wednesday, January 30, 2013

Remembrances

I never knew my grandmother Amanda. She passed on when my father was a youth. I like to think she was a vibrant part of the Edwardian Era ...a glorious Gibson girl, next door variety. What little I do know of her is that she was a widowed single mother, raising her four young children in difficult times. She was a teacher, and liked to write poetry. She had a love of fine things, yet appreciated the simple life that escaping to the mountains and nature made possible. 

Life was hard back in the early 1900's. People still pumped water from wells and used outhouses. Lighting in the home was often from kerosene lamps that cast a soft glow. Cooking was done on wood-fire iron stoves that heated a tank of water for washing and cleaning, and provided heat for the home in winter. Amanda met it all head-on valiantly and gracefully. Over the years, I have cherished two things that belonged to her: her wedding dress, and an old fine-silver letter opener with a beautiful mother-of-pearl blade. The dress is pale gray silk chiffon with beautiful needle lace trim at the neck and sleeves. It appears too have been home-sewn by a fairly skilled seamstress.  Sadly, it is deteriorating with stains and holes sprinkled throughout because of years of abuse in a wooden chest alongside mouse nests before I rescued it. The letter opener had not fared well either.  It was broken at the blade/handle join long before I ever laid eyes on it. Even so, someone must have seen the beauty in it, choosing to save it rather than throw it out.

Over time, and especially the past year, I have been holding ideas for creating a number of remembrances ...clothing and jewelry, that build in my own mind what Amanda might have been like. This is the first in a series of remembrances, creations that honor my grandmother. The pendant was cut from the end of the old letter opener she once used. I added silver beads to an old chain, and pearl and rhinestone dangles from the bell. Somewhere in the mix I added an antique button and tied in a tiny scrap of the wedding gown. I plan to create several more chains with faceted crystals beads, ribbon, and other beautiful things added to layer with this, even though it can certainly be worn alone. 


Friday, July 6, 2012

Studio Re-Do #3

OK, so I have had many things going on and the studio is advancing at a snail's pace.  However, I managed a quick fix in very short time this morning that I want to share with you.  I have seen several photos on Pinterest that show off some clever use of homemade chalkboard paint.  Some are chalkboard walls, old silver trays, and some are just painted boards in a  frame.  I chose the latter for my project.  I had a nice gilded frame sitting around waiting for a picture to beautify, but no board to fit.  Taking myself off to the craft store, I found that the canvas boards were sold in packs and would cost me far more than necessary.  So, I grabbed up a white foam board for this project.  Now is where I get experimental.


All the Pins I was used un-sanded grout mixed with regular latex paint.  I had checked with the local Lowe's, and saw that a small bag of grout was about $13.  Not bad, but all the recipe called for was about a teaspoon of grout, and that just seemed ridiculous to me.  So, after a friend suggested that joint compound would probably work too, I mentioned I only had the already been mixed kind.  "No matter" said my friend, and I am glad I listened.  I had this big tub, and some deeply purple paint to play with.  I mixed about 1/2 cup paint with a generous amount of joint compound (perhaps 3 Tablespoons, I did not measure), and spread it on lightly with a small trim roller (though just about any way of application would do).  I smoothed it out afterwards with a very light brushing over the surface.  It dried very quickly, without much warping of the foam board.  I gave it another coat after an hour or so. 

 This is the result...

Tuesday, May 8, 2012

Addictions

I mean addictions of the fun and harmless sort.  Like Pinterest.  Of course, if you consider not keeping your house clean enough for the white glove test, then that would be a more serious addiction too.  Well, I have been spending a lot of my free time there for a while now, and have built up some substantial boards.  When I have a few moments, I love going through my boards the way I used to pour through a fascinating craft magazine, completely entranced and inspired.  So much so, that I am beginning to get twinges of guilt at not using the time to be creating my own amazing things.

I started a board, ...well actually two three, of things I just have to make.  With summer's heat approaching, and decisions to make regarding what new clothing items I want to replace those that I know will appear shamefully shabby, or not fit me as I remembered as they come out of their storage places, I am planning new projects.  This time, rather than spend the summer in jeans as I await the loss of a few pounds in order to fit older clothing (as I have done for a few years already now), I am going to start a new trend for myself with layering.  This style is well known in the German tradition of "lagenlook."  It is  also very well established in the "shabby chic" styles that seem to be popping up everywhere.  I think this is a perfect way to take care of chilly mornings or evenings, and shivery air conditioning, and layers can easily be shed for sweltering afternoons.

 I am very taken with the idea of lightweight and gauzy fabrics.  I was thrilled to find a designer who made leggings of cheesecloth.  I daresay they would not hold up for long, but it gives me ideas.  I once made some wonderful elastic waist pants of silk gauze.  I had forgotten all about them, but they were the perfect solution for keeping cool with a matching hip-length wrapped and ruffled top.  With less than youthful skin tone (also known as crepey old lady skin), I wrestle with the thoughts of grossing out not only myself but anyone who might catch sight of my exposures.  Therefore, I do choose to cover up certain parts of myself but don't want to appear to be wrapped in a blanket or tented.  So gauze is a perfect fabric for hot summers.

Just yesterday, when my sweetie DH commanded me to "go shopping!"  I managed to find two great buys.  One, a cotton/lycra stretch lace long sleeve T-top at Steinmart, and another more solid yet see-through lightweight cotton long sleeve at Ross.  Both on clearance, I am excited.  Although they are both white, I plan to coffee dye the lace one.  Many people do tea-dying to age fabric, but tea-dyed fabrics have a much shorter life span than coffee-dyed.  I have not decided about the other top yet.  This will depend on what I choose to do with the rest of my wardrobe, and if I happen to drop food on myself while wearing it.

As some of you may have guessed, I have a very Bohemian sense of style, and I am ready to really let that out this season.  Because I am pretty much home-bound caring for my mother, I have quite a well-developed list of things to keep me busy.  My wardrobe will feature artfully created pieces that give me a sense of inspired pleasure to craft as well as wear.  So far, I have many old garments that I will be upcycling, as well as lots of fabric and trim scraps, old ancient unfinished projects to re-create, and loads of great ideas.The photo shows a hint of a pinafore top in the making.  Until a few days ago, it was a blouse for my mother that was left in pieces cut and ready to sew.  ...Left maybe ???25years??? ago????  Well, I do have a tendency to get distracted with certain projects.  The fabric is a lovely gauze, and the pieces were a generously cut style.  That may have been why this wasted away all these years, because my mother is a very petite woman who does not care for baggy clothing.  From the basic fronts, back and sleeves, I was able to cut new front and back, and pockets.  From a scrap I created a double ruffle flounce.  Adding in a touch of lace trim, a few fabric flowers, and it's looking quite fashionably shabby. 

Tuesday, October 5, 2010

I Used to Hate My Serger....


Years ago, in another lifetime, I spent 14 years working as head dressmaker for the North American office of the Burda Pattern Company, sewing model garments for trade shows. I loved the job, working from home while I raised my three sons. I got to assist at fashion shows, as well as getting all the Burda patterns and magazines I wanted. Working with the best of fabrics was really a plus too, though I had to force myself to get over the fear of cutting into some of the really precious ones that came my way. Anyway, when sergers came out for home sewing, Burda sent me one to use, and frankly, I was horrified. I was such a purist back then, thoroughly schooled in the Bishop Method as I majored in Textiles and Design back in college. ...Ya gotta know there were proper ways to finish seams for crying out loud!

Since then, so many fashion rules have been broken, and as there is an evolution for all things, so has my approach to sewing changed. I am discovering that the forlorn little serger that was banned to the recesses of the cl
oset for some 20 odd years (but I can never toss things out...) is now one of my simple pleasures. I really enjoy the time I spend now, serging odd shapes of fabric together and designing garments as I go. Its like the old Crazy Quilts I used to adore, and I have found a lot of artistry in the freedom it allows me. This past week, I have been eyeballing a piece of gray jersey, and making sketches, and Saturday, I had cut pieces ready to sew. By the end of the day, I had a new tunic to wear with a little Zen-like topper I had created a few weeks ago. Then, as another idea hit me, I made myself a ragged necklace out of the piece of fabric that was left-over.

Wednesday, June 30, 2010

Pink Ruffles and Shabby Chic


Several years ago, when I bought a queen bed, I made a duvet cover for my feather comforter, using an abundance of very old green and white cotton seersucker, cut into squares. I purchased a set of pink and white striped twin sheets, which I cut into squares and strips, and sewed them all together. Teaming this duvet with a set of pink sheets and some additional green bordered pillowcases made for a beautiful combination. However, while folding my clean sheets last week, I noticed that my pink pillowcases were becoming frayed along the edges. ...Yes, I must have had my glasses on at that moment, or it would have passed unnoticed. This fraying did not have me tossing them out and making a mental note to go shopping. With lots of wear left in the sheets, I certainly wanted to extend the use of the cases. Here is where not throwing anything away can pay off! Instead, I got out the sewing machine and remnants of fabric and made them new again.

Here is how I did this (Please pardon some of the photos that came out on the dark side)...

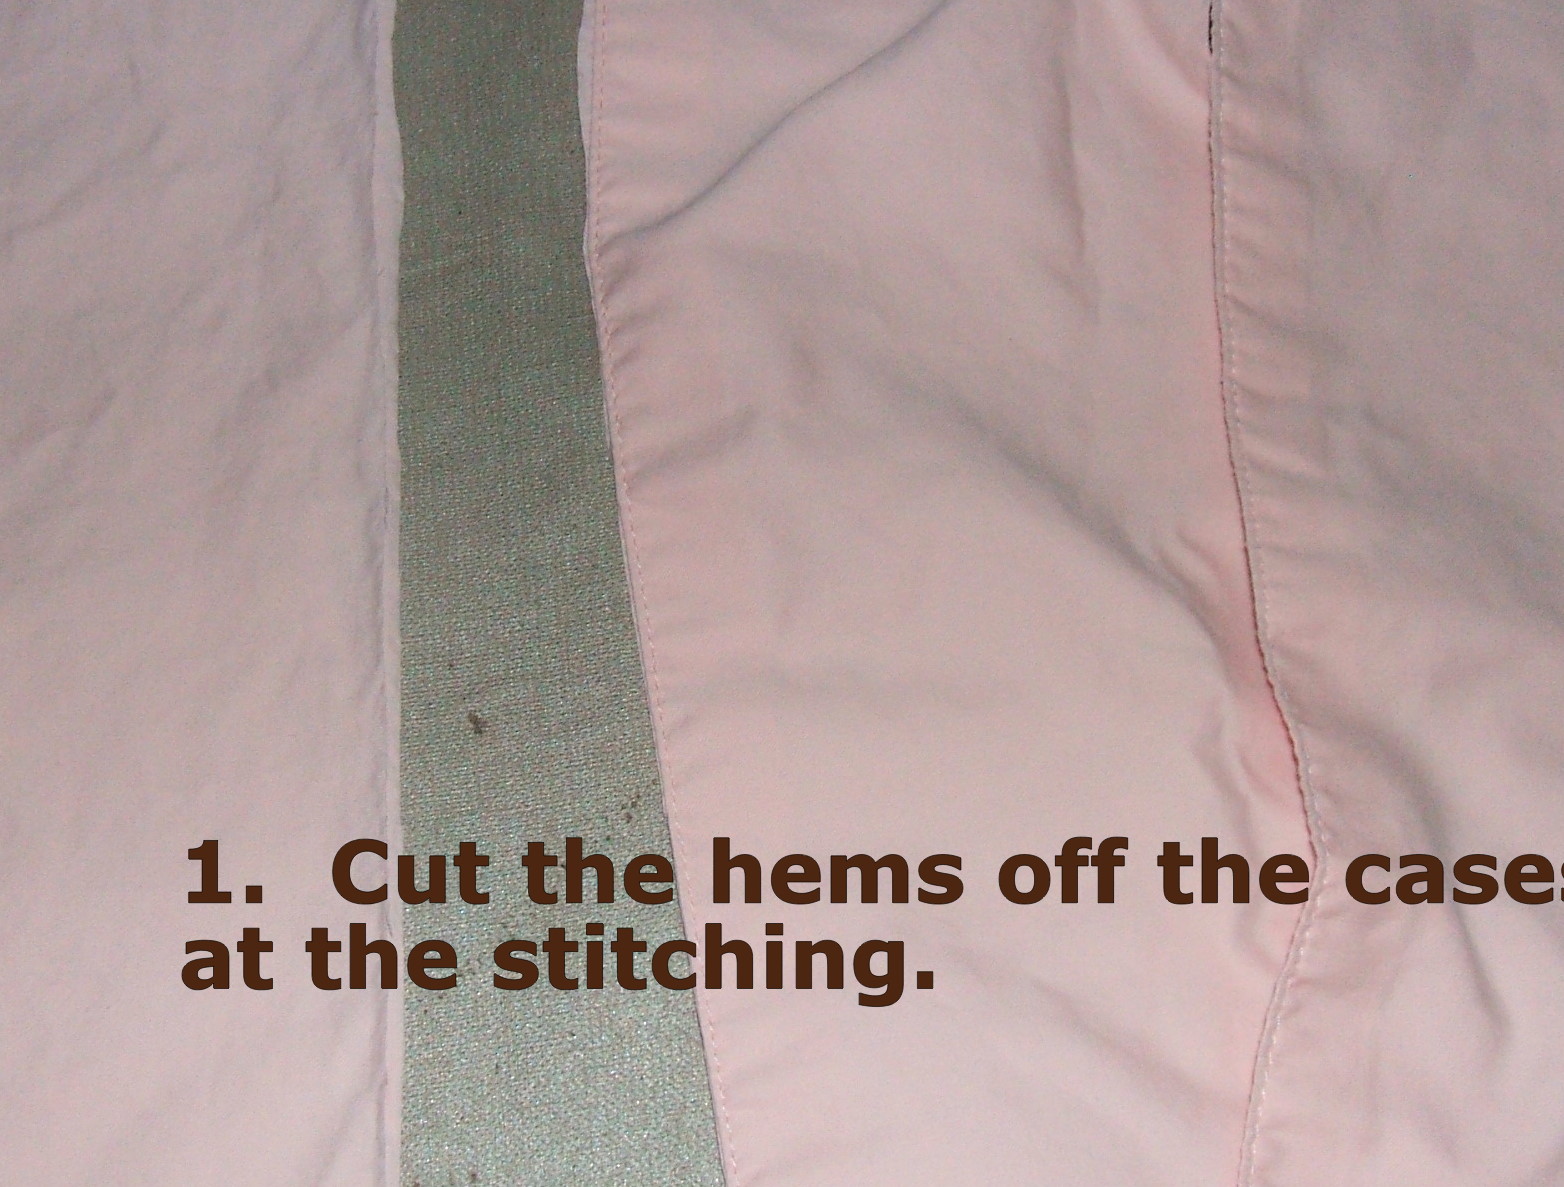
1. Cut the hems off your cases at the stitching.

2. Then, cut a strip of your ruffle fabric that is about 1.5 inches wider than your hem measurement.

A nicely flouncing ruffle is achieved by using the rule of thumb of cutting the strip 1.5 times longer than the edge you are sewing it to. For a very flouncy look, be more generous. Mine follows the rule of thumb.


3. Hem one edge of the ruffle strip, by turning 1/4 inch to the wrong side and pressing it flat. Then, turn it again, so that the raw edge is hidden, and press again.


4. On the opposite edge of your ruffle, run gathering stitches. This is done by sewing with the right side up, and having two rows of stitching, about 1/4 inch from the edge, and again 1/4 inch away from the first row. Gathering stitches will be the longest straight stitch setting on your machine.


5. After you have done the gathering stitches, then mark your ruffle by pinning each end as it lies flat. Then, match up the two pins, and lay it flat again. This will give you another halfway marker, dividing it into quarters.

Mark your pillow case edges in the same way.

6. Now, match up the markers and pin the ruffle to the case. Match the seam of the ruffle to the seam of the pillow case, and make sure that the right side of the ruffle is facing down against the right side of the case. The stitches that are viewable to you will then be gathered up by pulling the same ends of each set of rows, simultaneously, so that they will pull in evenly. Work slowly, and arrange the gathers so that they are evenly distributed between the pins. Be sure that the gathers are not so tight that they are tighter than the case.


7. Finally! Sew your ruffle to the case, with your stitching line just above the 1/2 inch gathering row, using a normal stitch length. This row of stitching is between the two gathering rows. Then, use an overcast or zig-zag stitch to finish the raw edges. Now, you can pull out the gathering stitch row that is outside all the stitching. Trim the thread ends, and turn and press your ruffle seam toward the casing side.

8. The final step! Do a row of edge-stitching, which is simply a row of normal size stitches, that are very close to the seam, or about 1/8 inch away on the casing side. This will hold the seam in place on the inside and keep a crisper look.